In this article, it’s all about treating squeaky door hinges and making them work the way they should. Squeaking door hinges usually indicates that there is a problem, and it’s very annoying to have to deal with it consistently. If not treated properly, there could be a case of much bigger issues down the road.
How to stop door hinges from squeaking? The first thing you should do when fixing squeaky door hinges is to take the pin out of the hinge and thoroughly clean the pin and inside the hinge with soap, water and a Q-tip. Use silicon to lubricate the pin and hinge and clean any access silicon.
Here are a few more ways to fix your door hinge from squeaking!
1. Tighten the Screws to Stop Squeaky Doors
Tighten all screws to stop squeaking doors!
First, try tightening the screws that hold the hinge in place. Some people are very shocked to hear just how often these need some tightening to keep everything in place.
If the door is used quite frequently, there’s a better likelihood that they need to be freshened up with some tightening overall.
One of the reasons why screws become loose is that they were never tightened that much in the first place. Try to get them pretty tight once they are on, because that will reduce the chances of this being an ongoing issue.
If a particular screw doesn’t seem to be staying in, it might be worth replacing that particular hinge and seeing if something else can work as a replacement.
Sometimes you need to soundproof the door, luckily here, thighning the screws can make your door silent again!
2. Bar Soap on the Hinge Pin
Bar of soap to stop door squeaks.
Something as simple as using bar soap can be very beneficial for lubricating hinges and making them sound a lot quieter overall. In fact, the right amount of bar soap can effectively eliminate any squeaky hinges whatsoever.
The process is very simple, as all the person needs to do is rub the bar soap on the hinges until everything receives an even coat.
Adding a little bit of water will make using the bar soap easier than going straight on. At the same time, don’t make it too liquidy, or it will become a sloppy project overall.
There’s also a risk of warping the wood around the door if too much water is added to the bar soap.
3. Petroleum Jelly on the Hinge Pin
The proper way to use petroleum jelly to remove any squeakiness with a door hinge is to take the pin out and cover it.
There doesn’t need to be a ton of petroleum jelly on it, but just enough that it’s fully covered and can be used just the same.
As time goes on, there might need to be some additional petroleum jelly added to the pin from the hinge to keep things lubricated.
Petroleum jelly works in a lot of the same ways as some of the other options using household products, so it comes down to what is available in the house already.
4. Olive Oil Inside Hinge and on Hinge Pin
Olive oil on hinge pin to stop door squeaks
A little bit of olive oil will help significantly with handling a squeaky hinge on the door. It’s messy to simply pour on the hinge, so grab a cotton swab or a paper towel and put some olive oil on. Apply it to the top of the hinge and let it soak in a bit.
Not only is it a natural product that most people have, but it’s pretty affordable as well. There might be a need to reapply the olive oil later on, but most people feel pretty confident that it will last a while.
5. Paraffin Candles on the Hinge Pin
Use the hot wax from paraffin candles the same way as petroleum jelly when treating door hinges.
This lubricant will still stay somewhat like a liquid so that the hinge works exactly as it should.
People who already have these candles around will be shocked to see just how much of a difference some wax makes.
6. Hairspray Inside Hinge and on Pin
Hair spray on door hinge to stop squeaks
It really doesn’t get much easier than using some hairspray to stop a door hinge from squeaking.
While it’s not going to last a super long time without getting applied over and over again, some hairspray polymers can seal around a standard door hinge. With a seal, there is less of an opportunity to squeak.
7. Silicon Spray/Lithium Grease
Silicon to fix door squeaks.
These two options aren’t the exact same, but they get lumped together because they are both more premium lubricant options available to treat door hinges.
A silicone spray (Amazon) can be found online and in stores, and being completely free of mineral oils and grease allows it to work safely on different surfaces.
Silicon spray has a variety of uses, as it works well on plastic, rubber, and metal specifically. The best way to utilize it is to remove the hinge pin and spray it inside the hinge. Also, make sure to get the pin covered and wipe off any excess.
Lithium grease works practically the same way, and some stores carry this but don’t carry silicon spray. It’s a little messier, but nothing too crazy.
What’s the best Lubricant for Squeaky Door Hinges?
The best two overall options are either silicon spray, or lithium grease. Both are relatively inexpensive, and buying just a little bit will last a long time.
Silicon spray is a little bit cheaper, and it’s very easy to apply. That’s why most people will start with the silicon spray first and see if it works perfectly fine for them.
Lithium grease tends to last a little bit longer, so that’s why people will spend the extra bit of money to use it.
Do Door Hinges Become Dry?
In many cases, door hinges start to dry out. That’s why a lubricant often makes sense as a fix. This can happen if the door isn’t used often or if the air in the home is particularly dry.
To fix this, apply a small amount of lubricant to the hinge. Just open the door and put a few drops of oil on the hinge, then close the door and open it again a few times to work the oil in.
A person will need to do this every few months to keep the hinges from drying out and squeaking.
View lubricants as a temporary solution for a problem that could linger for quite a while. The good news is that those door hinges won’t dry out too much, but there might be one or two problematic ones inside of a home.
It’s much easier to have those treated properly instead of doing every hinge in the entire home.
Can a Door Squeak For Being Installed Incorrectly?
If a door is making loud squeaking noises around the hinges and it is relatively new, there could be a bit of a fitting issue overall. This may be a case of the installer not doing everything properly when setting up the door.
If everything was just recently wrapped up, contact the company or individual who put the door up and see if they can take a look.
In most cases, they will offer insurance that they will fix everything and have it working the way it should in no time.
If the door is a little bit older and in a vulnerable area, fitting issues could be a case of some warping with the entire setup.
There are doors exposed to many different types of elements, and that can cause some warping issues that change the way the door operates.
It becomes pretty obvious to tell if a door is not fitting the way it should. The hinges are the same, and a sudden change in noise usually gives people a pretty good idea on what is happening.
In the future, try to look for doors that are a little less prone to warping if they are in a particular area. Also, do whatever possible to keep moisture away from the door if that’s controllable.
When is it Time For Brand New Hinges After it Begins Squeaking?
If the door hinges are still squeaking after trying all of these fixes, it may be time to replace them.
People can usually find replacement hinges at a local hardware store or online. Make sure to get the right size and style of hinge for a door, since certain doors operate differently.
There comes a point in time when a lot of people try different things that might temporarily fix hinges, but nothing works permanently. If that’s the case, going for a brand new hinge solution might be a perfect idea.
Buying new hinges might seem like a pretty straightforward process, but there are plenty of options available so that people can pick exactly what they want and allow it to fit into what they are going for.
There are two reasons why people replace hinges: to improve functionality and to switch up the look to something different.
In most cases, people don’t think about hinges unless they are replacing the door. However, if the door is used very frequently, there might be a need to replace hinges sooner than the door needs replaced. In that case, the easiest solution might be to go with the same look as before.
How To Fix Squeaky Doors DIY?
Most of the relatively easy fixes can be done without the need for a professional helping out.
Since the fixes include using household products or other solutions that aren’t exactly designed solely for fixing hinges, all it takes is a little bit of knowledge and manpower to go around and apply the product.
There is the instance of replacing door hinges entirely that professionals might need to step in and help out with.
This is especially true if it’s a door that faces the outdoors. People want to get this door right on the first try.
What NOT To Use For Fixing Door Squeaks?
With so many tips out there available to fix squeaky door hinges, it’s also important to know what options just don’t work.
Some people might think they are doing something that makes it change, but they end up doing more harm than good.
Not only can it waste money buying repair products, but it could do some damage to the existing hinges.
WD-40
There are many different uses for WD-40. It’s one of the most versatile products a person can own, and there should be WD-40 in every single household if possible.
With that said, it’s used to control moisture and lubricate any moving pieces. That might work in a lot of situations, but not on a door hinge.
The lubricant will easily start to attract dirt and dust on a door hinge. This means that the chances of the hinge pin turning black is pretty high over time.
It’s always better to go with a lubricant that is a little less likely to attract dirt and dust so that it lasts a long time.
Yes, WD-40 in small doses could work in a pinch, but try some of the other lubricants first. Chances are, people will find more success with them.
Cheap Replacement Hinges
Hinges are relatively inexpensive, so there’s no reason why a person should ever go the route of getting super cheap options to make a replacement.
It’s a move that just doesn’t make a lot of sense for the vast majority of people, because the last thing they want to do is put themselves in an incredibly vulnerable situation where the door no longer works.
Incredibly cheap hinges also could pose a problem for people as far as safety is concerned. A door can be ripped right off the hinges and broken into if they are not strong.
Skimping on hinges for a door that faces the outside is asking for problems down the road.
Why Squeaky Door Hinge Issues Shouldn’t Be Ignored
When a door hinge starts to squeak, it’s a warning that there could be more potential issues down the road. No one likes having to deal with any type of random squeaks in the home, and this is no different.
The good news is that hinges are relatively inexpensive if they need replacing. In most cases, they don’t need to be replaced, they just need a little bit of attention.
Making a few simple changes can make a home much quieter and more peaceful than in the past.
The best part is that most won’t have to ever reach out to a professional to get the job done since there are plenty of household items that work perfectly fine.
Squeaky floors can drive even the most sane people nuts. Loud creaking floors can wake people up in the middle of the night and cause everyone to loose sleep. These easy floor repairs will make you understand how you can get rid of squeaking floors in your home!
How to fix squeaking floors? There are a few ways to repair a squeaky floor, one of which is by adding some construction Adhesive for Long Gaps between floor boards. If the gaps are not very wide, clean between the floor boards and add a small amount of baby powder to get rid of the squeak!
Since squeaks can come from a few different locations, it’s important to figure out exactly where they are coming from before getting started.
It’s not always an exact process, but with a little bit of hard work and determination, the floor can be much more peaceful than ever before.
Where is the Squeaking in the Floor Coming?
Every single floor noise starts with some type of movement. Figuring out where the movement is coming from is the first step to getting rid of squeaks altogether.
There are two main areas where squeaks come from with floors, and the treatment is slightly different for each.
Board to Board Contact
If two floor boards are rubbing up against each other, they are going to make noise every single time they touch.
This noise will stay in one spot, and the boards will even be noticeably moving when they are walked on.
This usually only happens with older floor setups for a home. With that being said, this can make it pretty difficult to completely solve.
There might be some remedies here and there, but nothing will completely silence the squeaks until there is a significant change.
Subfloor
If there is noise covering larger areas, this usually comes down to the subflooring. There’s a chance that there won’t be any noticeable movement, but the squeaking won’t just stop.
Treating the subfloor is a little bit trickier, but the good news is that it’s fairly easy to repair with some simple fixes.
What Type of Floors Make Noise?
Many associate floor noises and squeaks coming from the floor with older homes only. The fact is, brand new homes can have creaks that are troublesome as well.
If the flooring isn’t fitted properly or is warped in any way, it can start to cause some creaking issues regardless of age.
Temperature plays a role in affecting the squeaks coming from floors. When it’s colder, dry air can create a little bit of shrinkage between floorboards and the subfloor. It doesn’t take much for squeaks to start to occur.
When it turns to summer, humidity tends to cause wood to swell just a bit. It almost feels like there’s no space available between boards, which can cause squeaking as well.
There’s a reason why there’s a little bit of space between floorboards in the first place.
The good news is professionals know very much all about how weather affects flooring. They are going to put everything into place the way it should be to minimize any complications.
Ways to Fix Squeaking Floors
Try these treatments out for squeaking floors. Some of them are pretty easy to try out with stuff already in most homes.
In other cases, a person might have to go out and buy additional material to get everything squeak-free.
1. Powder
Use Baby Powder on Squeaky Floors.
Whether a person opts for a baby powder (Amazon) or talcum powder, this is a perfect way to take care of an isolated squeaky spot on the floorboard.
It’s very simple, as sprinkling a little bit of powder right on the source will do a very good job. Try to massage it into the floorboard as much as possible so that it isn’t too messy.
Spread the Baby Powder in the Floor Gaps.
The trick is to knock the floor a little bit while putting the powder on, as it will start to drop down between the two boards. Remove the excess powder, and it should be good to go.
Don’t think about needing too much powder to see results. In most cases, just a moderate amount will get the job done.
2. Silicon
There’s a ton of versatility when it comes to using Silicon around the home. Most know that it’s a lubricant that can get jobs done with metals, but will it work around wood?
As long as silicon isn’t overused too much, it’s a great opportunity to get some of the squeak to go away.
Just make sure not to put too much silicon on the floor since it can get very slippery. Make sure to thoroughly clean the floor afterwards so it’s safe to walk on without slipping.
To better control the amount of silicon that goes on the floorboard, spray it first into a paper towel and then rub it into the affected area. It’s very easy to get carried away with the amount of spray that goes into a spot.
The video above features how I use silicon to make doors stop squeaking. It works like a charm compared to WD-40!
3. Clean Between Floorboards
If the floor is not completely sealed and there are ways to run something between boards, it’s always a good idea to do that and see how it heals any squeaking issues.
Floors get very dirty, and that means plenty of stuff can get caught between two floorboards if a person isn’t careful.
The squeaking could be fixed almost automatically with just a little bit of cleanup as far as that’s concerned.
How can it be cleaned very easily? Try using a knife for something very thin to get between the boards. This will help to dig out anything that doesn’t need to be there.
If it’s an ongoing issue there really seems to be more trouble than it’s worth, look into some type of sealant that can close off those small gaps.
Not only will this help to eliminate squeaking, but it makes cleaning the floors a lot easier.
4. Shim
Use Shim Under the Floor to Add Pressure.
If there’s access to the underside of the floor causing sound issues, placing a shim into the gap is a perfect solution in many ways.
A lot of times, people are surprised that there is a gap between the top of the floor joist and the subfloor. This can be alleviated with a little bit of carpenter’s glue and a shim put into the gap.
It shouldn’t be forced in there, as it will bump the floor and cause some issues. Just simply fill the gap, and the squeaky spot will go away.
It might sound like a complicated process, but what many will find is that they can take care of it all without any assistance.
5. Nail Additional Wood to a Warped Joist
Floor joists have the opportunity to shrink or warp if they are around for long enough. When this happens, there is a little bit of separation between the subfloor and the joists.The larger the gap, the more opportunities there are for creaks to creep in.
One way to fix this is to put a piece of wood into the troubled joist and let it go from there.
Make sure it’s laying flat against the joist and have it secured in an extra way with screws. With the extra wood, the subfloor is much less likely to move.
6. Construction Adhesive for Long Gaps
Shims work if they are put into very specific spots. If there is a long gap with the floor joist, a shim by itself is not going to work.
Construction adhesive (Amazon) is a better option, as something like a caulking gun will harden up and prevent movement with the floor.
Gaps tend to form on a particular side of a joist. Make sure to check both sides to see which one is the culprit.
Filling the gap with adhesive will make a significant impact.
7. Screwing the Subfloor and Finished Floor Together
The floor can sometimes separate from the subfloor, causing some squeaking issues that are just a little bit too loud for some.
A short screw could be all the person needs to fasten the subfloor and the floor together to eliminate any gap.
The screws can’t be too long in this case, as they don’t need to be sticking out at all. If it’s too long, it could also go to the floorboards.
It’s a pretty simple solution, but some people will hire a professional just so it’s done correctly.
8. Fixing Squeaks Above the Floor
Not everyone has access to the underneath section of a floor. If that’s the case, try to find a spot making squeaking noises and also the underfloor joist. Put the nail into the floor so that it goes into the joist.
It’s important that the nails are below the surface of the floor so that they aren’t in the way later on.
The important part, like always, is to eliminate the gap so that the squeaking stops once and for all.
9. Carpet/Rugs
One of the oldest tricks out there when it comes to squeaky floors is to simply put down carpet or use a rug in that particular area.
Of course, not everyone wants to look at carpet or a rug in that room, but those who don’t mind will find it to be a great fix overall.
Hardwood floors definitely have their appeal, but they can be extremely noisy. Not only are their squeaking issues amplified, but basically any noise coming from those floors is going to be tough to deal with compared to carpet.
For a much quieter area, using a softer surface on the ground makes a lot of sense.
How to Fix Squeaky Laminate Floors!
Laminate floors can look great when they are brand new. A lot of people go with them since they are a cheaper option compared to hardwood, but they do share a pretty similar problem. As time goes on, they are more and more prone to squeaking issues.
Stopping laminate floors from squeaking and creaking sometimes seems fairly easy, but it all comes down to identifying where the sounds are coming from. Finding a solution that lasts a long time will make a big difference.
Want to fix a squeaky laminate floor without spending a lot of money? If it’s a minor issue that needs a little bit of care, these tips might be the way to go.
1. Apply Talcum Powder
Most people already have talcum powder (Amazon) in their home. This powder has plenty of uses, and one of them can be treating a squeaky laminate floor!
Put some of the talcum powder on the floor surface and put it in between the floorboards with a paintbrush. What happens is that the talcum powder will lubricate the joints where there is a lot of creaking.
After talcum is applied, make sure to clean off the flooring to prevent any slipping accidents. Another way to kill the sound is to put some carpeting over that area as well. It can be temporary or permanent.
Talcum powder isn’t going to last forever, but it provides a temporary fix. It’s also easy to apply over and over again as long as a person remembers.
2. Use Adhesive
An uneven subfloor can cause quite a few sound issues. Lifting up laminate boards to have access to the joist makes it a pretty easy fix.
All the person has to do is apply some sealant to stop movement between the joist and the subfloor.
Construction adhesive it’s pretty affordable, and it could be used whenever there are issues to pop up.
Don’t be afraid to try out a few different adhesives at home first. It won’t really hurt anything, but not everything is effective.
3. Screw Laminate Floor Into Subfloor
A long-term solution that can be done without any professional assistance is to screw pieces into the subfloor and eliminate movement as much as possible.
All it takes is identifying where the sound is actually coming from, and a drill bit can go into the hole to help out with everything.
Make sure to look for a wood screw option instead of a drywall screw. It’s going to last much longer, especially when a person pushes the screw head in a little bit deeper than the surface of the laminate.
After everything is done, use some wood putty to cover the screw to hide the repair.
Keep in mind that this will not work for a floating floor installation. It’s only going to work to adjust the underlayment by securing the subfloor screws.
4. Joist Mounts
Using adjustable joist mounts can be a great way to get a fix as long as a person has the ability to access the underside of the wood floors.
It’s better to address the issue from this direction in many cases. Start by having someone walk up the stairs and listen to the floor moving around and making creaking noises.
Once the noise source has been located, put an adjustable joist mount to the bottom side of the subfloor right next to the floor joist near the area where the floor is moving around.
Make sure to attach the bottom half of the joist mount with a screw into the underside of the subfloor. Wrap it around and into the joist, tighten things up, and the subfloor is finally secured.
5. Installing Rugs or Carpeting
This might not exactly be a perfect fix for creaky laminate floors, but it can be a way for people to get everything back to normal so that they are no longer having to deal with sound issues.
What carpeting or a rug can do is drown some of the sound that is nothing more than a distraction. There’s also a way to put additional layers underneath these to help treat sound as well.
Of course, people are losing the appeal of having a laminate floor in the first place. Without having a laminate floor to look at, it takes away the investment in the first place.
Some people move away from carpening because they no longer want it.
6. Move Certain Furniture Away From Noisy Areas
If a part of a laminate floor is making a lot of noise, it could be because of what’s sitting on top of it.
There are some people who have heavy furniture causing squeaks and different sounds throughout the day. Whenever there are pinch points created, it can cause some disturbances.
Moving the furniture away to another area could help identify the problem. Maybe it’s just rubbing up against that particular part of the floor, but it can be fixed with a move.
It makes sense to move around heavy furniture periodically anyway so that nothing is sinking the floor or causing permanent damage.
7. Hiring a Professional
There’s always the option of hiring a professional to come out and take a look at what exactly is causing the issue.
While it’s going to be the most expensive option, sometimes it is the only way to get everything sounding the way it should.
What they will be able to do is completely replace certain parts of the floor if they have to.
It’s a last-case scenario for some people, but it’s still better than having to live with flooring that is not exactly sounding the way it should.
What Causes Laminate Floors to Creak?
The floorboards of a flooring creak and squeak for plenty of reasons. Failure to identify what is causing the issue will lead to a lot of troubleshooting.
The good news is that there’s really only three main issues that end up being the problem for homeowners.
Underlayment Issues
The underlayment is what goes underneath laminate flooring. It is what sits between the floor and the subfloor.
Plywood is usually what is used in new construction. If the plywood has been compromised or is not existing, the two floors might be rubbing against each other.
When there’s any type of friction like this, it becomes noisy.
Bad Subfloor
Subfloor attaches to the flooring through the joist. A subfloor needs to be installed properly, or there could be some squeaking with the gap in between.
Anytime there is pressure on the subfloor and the lineup isn’t accurate, it creates an issue.
If a subfloor is not installed correctly, it could be because the person in charge used a nail gun instead of screws.
Nails will pull away as time goes on, and it loosens up the subfloor from the joist. This can create gaps that are only going to creak more and more as time goes on.
Moisture
Flooring is going to swell no matter what it’s made of. Laminate floors don’t swell quite as much as wood, but there needs to be a little bit of a gap for expansion.
Not only that, but using moisture-blocking underlayment for the floor as well.
Should I Worry About Squeaky Floors?
A somewhat squeaky floor is not going to be too much of a problem. What a person really needs to look out for is whether or not the boards are moving around a lot when walking. If it becomes a tripping hazard, there could be a problem.
There’s also instances where there is a drop in level when a laminate floor plank is broken. People usually notice that there are bigger problems than just dealing with noise at that point. It could still cause some sound issues.
What if the Surface Itself is Making Noise on a Laminate Floor?
There are squeaks and creeks that people need to watch out for, but there are surface sounds as well.
Sometimes, they can’t be avoided, especially if the person is walking with shoes on and coming up against laminate flooring.
There’s bound to be some squeaks if there is some movement in the right spots.
If the floor is too squeaky, there are different ways to clean it and add some texture as well. It might not be as aesthetically pleasing, but it at least kills the annoying noises.
Why Laminate Floors Needs Fixed
No one likes having to deal with squeaky laminate floors if they don’t have to. As annoying as they can be, it’s even more annoying to have to pay for and fix out-of-pocket.
Try out the cheaper options first and see how it all works. It might be surprising how something so simple can make a difference.
Squeaky floors create annoying problems that never seem to go away, but there are tricks out there worth exploring.
How to Repair Squeaky Floors Under Existing Carpet?
It’s already been talked about that a carpet or rug can limit the amount of noise a squeaking floorboard makes.
However, there are times when people just want to fully repair what’s underneath, and that means thinking outside the box.
This involves using a screw through a carpeted floor. It might seem like it would do some damage to the carpet, but it can be fluffed up and covered properly so that it looks like nothing was ever touched.
The best part is that a person automatically avoids having the need to go through the entire process of taking the carpet up and treating the floorboard in that regard.
Even if the floorboard isn’t entirely fixed with the squeak, it’s still better than doing nothing at all. Combined with the way that carpet and rugs help out with killing sound, it’s a great overall setup. ]
When is it Time to Repair Floors Altogether?
The current amount of squeaks might be indicating that there are bigger issues with the floor in general.
If it seems like squeaks just won’t go away with any methods that are talked about in this article, it might be best to look into replacing the floor altogether.
This is a big blow to a person‘s finances, as nobody wants to look at the extensive project of replacing an entire floor.
The good news is that in some cases, only part of the floor is necessary to replace. There are ways to get around a huge price tag and only do some fixes that are a little more budget-friendly.
Floors that are in poor enough shape are vulnerable enough that they could do much more than just make noise.
The last thing anybody wants to do is push flooring to the point that it could fail altogether. If it’s a second floor or higher, the squeaks are a very minor issue compared to failing.
What type of cost is the person looking at if they need to install a brand-new floor? With hardwood flooring, there is quite a bit of range.
On the low end, people probably won’t find any flooring lower than three dollars per square foot.
On the high end, it can get above $20 per square foot. This is including both the materials and labor to get everything ready for use.
How Do Squeaky Floors Affect Others?
Squeaky floors are automatically noticeable when a person is in that room. They are the ones causing the squeaking, and it starts to bounce off the walls pretty easily. However, squeaky floors usually mean that other areas are affected.
At the very least, any floor below the flooring is also dealing with the squeaks. In fact, they might be dealing with more noise since it is bouncing off of the ceiling.
People who own both floors of the property already know this, but it could be impacting others if it is a shared space.
There might be instances where people have their hands tied as far as making replacements and fixing up the floor in general.
If it’s affecting someone else’s apartment or office, there comes a point where there needs to be a replacement done so that a person doesn’t have fines sent to them.
Do Squeaky Floors Hurt Property Value?
Real estate agents will be quick to point out that squeaky floors are indeed a negative when it comes to selling a home.
Most people who are in the business of looking for a brand new home don’t want to deal with any type of additional fixes that could become very costly.
Squeaky floors might seem charmful in an older home, but it just means another cost for the average buyer.
Unless it’s a true fixer-upper, most people want to have a house that’s easy to move into right away and does not need repairs that could displace them for a little bit.
When an entire floor is replaced, a family usually has to move out and do something else until it’s finished.
Try to take care of squeaky floors as much as possible before listing any type of property on the market.
It’s one of those things that is impossible to hide, as any open house is going to showcase the squeaking front and center.
A home doesn’t have to be perfect, especially if it’s older, but controlling the squeaks as much as possible will be beneficial.
Is It Worth Fixing Squeaky Floors?
No one likes having to make simple repairs around home, but taking care of squeaky floors early on will prevent further damage later.
Squeaks aren’t going to go away by themselves, especially when people are walking on the floors every single day.
Plenty of solutions exist that are completely doable by an average person with some general tools and equipment.
However, hiring a professional is always going to provide some extra peace of mind to fix squeaky floors as well.
There are some instances where squeaks are just too much and the entire floor needs to be replaced, but most people have additional issues besides just a squeaking that will indicate that.
Inside a home or office, floors are used so much throughout the day that they are bound to go through some issues once in a while.
Don’t be afraid to give them some care so that they don’t break down over constant usage. There are way too many people out there who have fallen victim to letting a few squeaks be ignored.
The next thing they knew, the squeaking was becoming so bad that the entire flooring needed to be replaced. It’s much easier to try some smaller solutions that make sense for anyone on a budget.
There’s nothing worse than being the person walking around who is making a lot of noise with their shoes. Wondering what would be. the best ways to fix squeaky shoes! With every single step, people feel self-conscious about themselves as their shoes squeak around and distract others.
How do I stop my shoes from squeaking? The easiest ways to stop your shoes from squeaking are to use a shoe cleaner like WD-40 Brand by spraying the outside of the shoe only. The inside should be sprinkled with talcum powder or baby powder to get rid of moisture, which could be the cause of the squeaking.
Instead of tossing them away, there are some worthwhile tips out there that help people get rid of squeaky shoes. Since most of the tricks are simple, the best thing to do is to try different options and see what sticks.
1. Squeaking Damp Shoes In Dryer
Placing Damp Shoes in Dryer
There’s a good chance that the shoes are squeaking because there’s some form of trapped water inside them.
In order to avoid the issues from getting worse and worse, try them out. One of the best ways to do that effectively is to throw them in the dryer.
Make sure to add a little bit of fabric softener to the shoe by first putting it on a sponge or washcloth. Instead of putting it directly in the shoe, put it inside the dryer with the shoes.
It doesn’t need too much dryer action, as anything less than 10 minutes should do the trick. If a person leaves them in for longer than that, there’s a chance that the shoes shrink or are permanently damaged by heat.
Be close by when using a drying machine, because it’s important to pay attention to certain materials.
If they are expensive, brand new shoes, use the drying machine as a last resort. The other options below might be a bit safer.
2. Fix Speaking Shoes Using Baby Powder
Baby Powder in Squeaky Shoes
A lot of the pesky moisture gets trapped right where certain parts of the shoe are rubbing up against other parts.
Most of the time, that’s where the squeaky noise comes from if it’s inside the shoe and a relatively new sound.
Not every single shoe has a removable sole, but putting some powder around that sole will do the trick as well. It could be as simple as there is some moisture where the foot and the shoe are meeting and rubbing around.
Most people already have baby powder hanging around the house, so this is a very easy attempt to get things back into work in order.
Even if it doesn’t work, it’s not going to do any type of damage to the shoes whatsoever.
3. Softening The Squeaky Soles
Is there such a thing as soles being too new on shoes? That’s actually the case for some people who have very noisy issues. They need to break them in a little bit so that they don’t make as much noise.
Obviously, no one wants to get to the point where they are wearing down the sole so much that it takes away from the longevity of the shoe.
At the same time, taking a little bit of sandpaper or other rough material will allow for the bottom to soften up a bit. When the shoe is softened, the squeakiness starts to fade away.
4. Petroleum Jelly
Petroleum Jelly on Squeaky Shoes
Commonly known as simply Vaseline, petroleum jelly is worth it for people who have noticed a little bit of squeaking around already and feel like nothing else is working.
One of the quickest ways to fix squeaking issues is to put a small amount of petroleum jelly underneath the insole.
This will help make sure that the parts don’t rub up against each other in a weird way. Everything goes a lot more smoothly, and it might be able to fix it long-term as well.
If someone puts too much petroleum jelly on their shoe, it can start to squish and not be the most comfortable to walk on.
It should be no more than a similar consistency to applying glue to a shoe (or any project for that matter).
5. Dryer Sheets
A dryer sheet can also act as a way to separate the insoles from the bottom of the shoe that is making some noise.
It might seem a little unconventional, and it’s not necessarily recommended for athletes because it can provide just a tiny bit of slippage.
However, casual shoe-wearers might find that a dryer sheet gets the job done permanently.
If the squeaking sound comes back, pay attention to the dryer sheet and see if there are any holes developing. That could be one of the reasons why it is becoming too much of a noise-maker.
6. WD-40
There’s a saying that WD-40 can fix just about anything. Right on the can, it says it stops squeaks, dries out moisture, cleans, and protects.
With WD-40, people use this for shoes on the inside or the outside. Wherever the noise is coming from, WD-40 can help out.
Suede is not going to react well to WD-40, but everything else should be perfectly fine. There’s no reason to cake on the WD-40, as just some light spray will get everything accomplished just the right way.
7. Leather Conditioner
There are delicate pieces in every pair of shoes that might actually be causing some squeaky sound issues. For example, the shoelaces could be rubbing up against other parts of the shoe.
The same can be said for the tongue, as it is sometimes made out of completely different material than everything else.
If it’s a more premium shoelace or tongue, a leather conditioner (Amazon) can help out. It softens up the shoe a bit and ensures people have a much quieter walk overall.
Any type of conditioner works, and it’s useable on many different shoes.
8. Shoe Glue
Glue To Fix Squeaky Shoes
Shoes aren’t built to last forever. In fact, even some relatively brand new pairs of shoes will need some shoe glue (Amazon) or other repairs to get them back into working order sooner than one would imagine.
The good news is that quality shoe glue is relatively inexpensive, and it can last a while if it’s stored correctly.
Make sure to take a look at the soles and heels squeaking shoes and see if there’s a gap at all. Generally speaking, these are two troublesome spots that need a little bit of shoe glue.
Super glue helps to some extent, but it’s so inexpensive to get shoe glue that it’s usually worth the investment.
Shoe glue doesn’t harden up right away, so any excess amounts can be scraped off to give a professional look. Try to keep everything tightened up so that it dries up properly and works the way it should.
9. Hire a Professional
Shoe repair isn’t as popular as it was in the past, but there are still plenty of people who will take care of shoes for a price.
Cobblers tend to work on premium shoes more than anything, but they can take on just about any task.
The great thing about cobblers is that they will know exactly what to do. There’s no guesswork, and they will get the job done professionally from the very beginning.
It could end up saving a person a lot of money instead of having to buy a brand new pair of shoes because something happened to their old pair.
How Long Will Shoes Remain Squeak-Free?
Unfortunately, there’s no guarantee that any of these fixes will last long-term. That’s because new issues might pop up with any pair of shoes, and they will need treatment themselves.
With so many different ways to keep shoes from making too much noise, it’s nice to have options. A lot of it is trial and error, as no two pairs of shoes are exactly alike.
Do Companies Offer Money-Back Guarantees for Squeaky Shoes?
If there is a legitimate defect to the shoe, they will offer a money-back guarantee in most cases. It could just be a faulty pair, and they’ll take them back without asking any questions.
If they are worn and there’s a chance that the squeakiness developed because of the conditions, shoe companies are likely not going to offer any type of money-back guarantee.
It’s frustrating if shoes are relatively new, but they have no way of knowing if a customer did damage to them.
How Noticeable Are Squeaky Shoes?
Keep in mind that most people are a lot more cognizant of squeaky shoes than those around them.
What might be bothering someone walking around won’t be that noticeable to others. Once someone identifies that they have squeaky shoes, it’s hard to ignore.
With that said, people should take more of a step toward fixing squishy shoe issues if they work in a quiet setting with hard floors.
These are usually the worst for shoes making noise. Carpet kills sound caused by squeaky shoes, and so does a lot of ambient noise.
Final Word on Squeaky Shoes
A nice, new pair of shoes can bring joy to people for a lot of reasons. With that said, if they don’t sound as they should, it gets tough to wear them on a regular basis.
Shoes are supposed to squeak to some degree, but a lot of fixes can be done with relative ease. There are not that many parts to a shoe, so the noise generally comes from a few common areas.
Try to keep shoes as dry as possible so that moisture doesn’t cause issues. If they are wet or there’s a lot of sweat built-up inside, try to leave them outside to dry properly.
It’s tempting to put shoes in the dryer if they are a little bit wet, but that usually does more harm than good. At the very least, putting them in for a short amount of time on low heat is tolerable.
Try to wrap them up in a pillowcase or some other type of bag so that they don’t bounce up against the walls and have their look messed up. For all these reasons, most never bother putting them in the dryer to save the hassle.
Shoes will always make a little bit of noise since they are making contact with the ground. There’s no such thing as a perfectly quiet pair of shoes.
Treat shoes the right way, and they should last a long time without being too much of a nuisance.
Many companies out claims to have the quietest air compressors on the market or the most silent and quiet compressor out there. These adjectives can be thrown around pretty freely, but there will always be that perform better than others.
Not only is the dB level focused on, but their overall productivity also makes a big difference. Ranging from very affordable quiet air compressors for smaller areas to commercial grade solutions, there is something for everyone to take a look at.
The best way to break this down is to go by the size of the compressor. After all, it does not do anyone any good if there is a very quiet air compressor that is meant for small solutions.
To get full coverage, it would need to be much noisier, and it is better to go with a bigger option in an industrial setting. These are all high-quality air compressors worth putting on any shortlist.
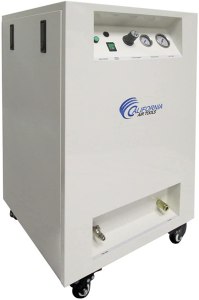
California Air Tools 8010SPC
One of the smallest and quietest air compressors out there right now is from California Air Tools is the California Air Tools 8010SPC (Amazon). It will not be the biggest by any means, but it can run many different tools with ease.
Being able to fit into just about any location also helps considerably, as people working with smaller places do not necessarily want anything too big.
The standout feature of this compressor is the powerful, yet quiet motor. There is no oil needed, which cuts down on the overall maintenance of the machine.
The motor will operate at about 1400 rpm, which is pretty powerful for the level of sound it produces.
Helping with the sound of it is a soundproof cabinet that has a good amount of insulation to reduce noise and vibration.
It also helps with durability in a lot of ways, as the 8-gallon tank is very well constructed, yet protected to help cut down the sound.
If any accidents occur when moving this around, it will not break down like some lesser built options out there.
California Air Tools 8010SPC
The air output of the machine allows for maximum psi of 115. This is going to run most tools that a person needs just fine, but there might be some people who want something a little bit bigger.
It is pretty lightweight for an air compressor at 125 pounds, and the wheels on the device make it easy to move around the house without having any problems whatsoever.
All in all, this is a solid option for those who want something that is pretty compact and extremely quiet. The cooling fan is the only thing a person ends up hearing a little bit, but even that stays at a low level.
Pros
Very durable.
Easy to move around.
Very little maintenance needed.
Cons
Cooling fan gets a little loud.
Not big or powerful enough for some.
Kobalt Quiet Tech 4.3 Gallon Twin Tanks
A lot of people who have done just a little bit of research knows all about Kobalt and what it brings to the table in the industry, especially this Kobalt Quiet Tech 4.3 Gallon Compressor (Amazon).
It is a very high-quality option for anything from power tools to toilets, and their air compressors are no different.
This is one of their most popular compressors, and a lot of it comes down to being very quiet and portable.
With a strong motor that can get the job done in many different ways, quite a few people have relied on this for a while.
The motor on the Kobalt Quiet Tech is pretty impressive, as it works off 120 V. Like a lot of quiet options, there is no oil needed for the pump, so there is less of a risk of the motor burning out too early on.
It will stay strong throughout, and with very little maintenance, it is perfect for those who do not want to have to hassle with that.
Air pressure is also solid for this heavy-duty constructed option. It can get up to levels of 150 psi with the 4.3-gallon twin tanks. That means a person can run just about anything they need to without having any issues.
Kobalt Quiet Tech
Despite seeming very quiet and portable, there is some heavy-duty construction connected to this device.
It is made up of solid metal that will last a long time, and even the tires make it easy to move around and not worry about it breaking down.
Some people believe that they should not move around an air compressor too much or run the risk of breaking down. That is not the case at all with this air compressor by any means.
For people who do not want to deal with a less than stellar option, Kobalt is one brand name that just about anyone can trust.
The negatives of this compressor are few and far between, which is about as convincing as a person can ask for when shopping around.
Pros
High quality construction all around.
Motor is surprisingly powerful.
Limited maintenance required.
Cons
Brand-name carries a bit of a premium.
While portable, there are lighter and smaller options.
California Air Tools 8010
Another California Air Tools option that is well worth checking out is the California Air Tools 8010 (Amazon). With a 1 hp oil-free motor and 8 gallons available, this is a great and powerful air compressor overall.
People have been counting on this for a few years, and it is perfect for those who need a little bit more power added to the mix.
The standout feature obviously comes down to the very strong motor. With 1 hp, it is still very strong and durable for a variety of uses.
A little bit of oil is needed for the run, but it is overall pretty easy to maintain. Being able to operate consistently for a long time helps quite a bit, and if a person really wants to push the motor, they can get it up to 2 hp and not feel too overwhelmed.
Air output is among the best in its class, as it takes just a little bit of time for a tank to fill properly.
California Air Tools 8010
It is one of the annoying things about some of the other air compressors out there, as the time it takes to fill and be ready to go can be a little off-putting. This is one of the fastest options, with just as much durability overall.
A long-lasting air compressor certainly helps out quite a bit, and with a runtime of over 3000 hours, it is a great option to have people who do not want to worry about having to make any replacements anytime soon.
Being able to run at the dB levels that hovers right around standard chats helps out considerably as well.
Pros
Lasts a long time.
High air output.
Lightweight for the power.
Cons
Air pressure can be a little unreliable at times.
Despite being lightweight, can be a little cumbersome to move around.
In fact, a lot of people will gravitate towards this one simply because of its ability to be put into use almost instantly.
There is no reason for people to have to worry about having to set things up every single time to move things around, and that is why people will count on it every time.
Having an air compressor that is powerful and durable certainly helps. Most are looking for a very stable structure overall, and the steel housing of this air compressor certainly helps.
It is much better than some of the aluminum options out there, which means that if something is to hit it or it is compromised somehow, it is going to be just fine.
Stealth 12-Gallon Ultra Quiet Air Compressor
Most air compressors that jump up to 1.5 hp with the motor become a little bit loud. Stealth can keep the sound down a little bit, as it runs in the high 60s as far as dB is concerned.
Most people will be able to use it just fine without any ear protection, as it will be just a little bit louder than a normal conversation indoors. In an outdoor setting, it is going to be easier to utilize when it is time.
Need power at the right time? When that is the case, this motor produces as one might imagine.
It takes just over a minute for the tank to fill, and they can put out for CFM at 90 psi with these. It has a peek of 150 psi, which is just about all the people could ask for.
Pros
Quick and easy to connect.
Reaches high air pressure.
Lifetime warranty.
Cons
A little bulky to move around.
Some get frustrated with just 12 gallons in size.
California Air Tools CAT 30020C-22060
For a 30-gallon air compressor, this is one of the quietest options on the market right now. With no required oil and many other setups that help reduce the sound, people love the fact that they can operate this in just about any location.
For an air compressor of the size, hovering around 70 dB is certainly impressive. Many people use this either at home or at a shop, and it can do well in just about any setting.
The motor is pretty powerful, operating at 1680 rpm, but it is durable as well. It can last over 3000 hours with minimal maintenance required, and that makes it well worth the cost if people are worried about spending too much money.
The power of the air compressor is certainly one that impresses a lot of people out there. It has a 2 hp motor that starts up with ease.
California Air Tools CAT 30020C-22060
This works especially well for people who might have trouble with other air compressors in the past because of the temperature.
There is nothing worse than dealing with an air compressor that just does not want to start because of the weather.
Holding 30 gallons of air, fortunately, means that it will be perfect for those who might have larger projects in place.
Sure, people may need to sacrifice portability a bit and deal with slightly louder motors overall, but it is well worth the trade-off for those who have quite a bit to operate. In this range of options, there is nothing quieter and better overall.
Pros
Works well in cold weather.
Lasts a long time.
Very powerful motor.
Cons
One year warranty could be longer.
Some might want a better CFM.
California Air Tools CAT 60 Gallon -60040CAD
Jumping up to 60 gallons, this is where an air compressor is starting to get pretty serious. Whether a person has a pretty impressive garage set up, or they run a shop of their own, this is one worth looking into.
With a higher capacity and an outstanding CFM output, most people who need something like this but do not want to go too big will settle for an option like this.
California Air Tools 60 Gallon (Amazon)put a 2 hp oil us motor in this air compressor. This is perfect for those who want a lot of power, but do not necessarily want to spend a lot of time keeping up with maintenance. It is an oil-less motor, which is always going to help out.
The motor operates pretty quietly, which is good news for those worried about larger units making a lot of noise. Overall, it sits in about 75 dB when running normally, which is considerably less than others in this size.
Pros
Quiet for its size.
Powerful, oil-less motor.
Better portability than most.
Cons
Some small reported issues online.
Some might need a larger option in a commercial or industrial setting.
EMAX E10V080V1
It might be frustrating for some people to look at large air compressors and find that they are pretty loud overall.
Capable of holding 80 gallons of air and operating with a 10 hp motor, this can handle just about any job out there. The best thing is that it is one of the quietest in its range.
Getting an air compressor like this under 80 dB is certainly impressive, to say the least. Most of the time, it is going to operate right around 75 to 78 dB.
This means that while it will be louder than a normal conversation, it will not overwhelm people who are trying to have a fairly quiet workspace.
It is really not that much louder than some of the smaller compressors out there, which is crazy impressive for something so powerful and large.
Since this is mostly recommended for professionals in an industrial setting, it is even easier to deal with the sound.
Most of the time, people are going to have larger spaces to work with, so they can have it in areas that will allow it to not be as overwhelming with the sound.
The longevity of this air compressor is something that will be very impressive for owners out there.
Due to the high-quality build and low amount of maintenance, this is built to last for over 70,000 hours of pretty steady use.
Being able to operate in extreme temperatures also helps considerably, as people get very frustrated with dealing with compressors that struggle in the cold.
Overall, this is perfect for those who need an air compressor of this size. It is not for everyone, but there are cheaper and more affordable options out there for a reason.
For those who need the best in power and a very large tank, the quiet options can feel few and far between. This is an exception to that rule.
Pros
Very high CFM.
10 hp motor is impressive.
Works in all types of temperatures.
Cons
Not a portable air compressor.
Warranty is limited to five years.
Why Are Air Compressors So Noisy?
The goal of an air compressor is to be a very easy to use and convenient machine to have for multiple purposes.
Whether it is filling up some tires or operating some tools, it serves a purpose and is readily available at all times. However, if it is too loud, people will not be thrilled with using it that much.
It is not the end of the world if something is very loud, but a quiet air compressor makes it much more enjoyable to use. What causes an air compressor to be noisy? These are some of the reasons why.
Friction
Whenever something is hitting up against the hard parts of the machine, an air compressor will make a decent amount of noise.
That is why some of the quietest air compressors have very small and minimal moving parts, so there is less chance of being noisy.
Some of the older models might start to have more friction as they are coming apart very slowly.
Also, be on the lookout for any other materials near the air compressor, as when it operates, it can vibrate a little bit and rub against something that will cause friction.
Power
There are two main options for an air compressor, as it can be either gas-powered or electric.
The gas-powered option is always going to be louder when doing a direct comparison, as it operates on combustion and having metal parts move around.
Since electric air compressors are going to run off the voltage, it will be very similar to how new electric cars run. They are much quieter, and they will smoothly operate as they should.
A Clear Environment
It was already touched on a bit about how friction can cause a lot of noise. Where an air compressor is put inside of a specific area can largely dictate the sound.
Try to make sure that the environment an air compressor is put into is clear so that the chances of sound problems are greatly reduced.
How Quiet Can an Air Compressor Realistically Be?
Everyone wants the quietest air compressor, but just how quiet are they capable of being? A lot of noise measurements are done in decibels, and it is the best way to do direct comparisons.
When talking at a normal tone, the decimal levels tend to hover around 60. That can give people a pretty good idea of what to expect with an air compressor, as quiet units will be about 10 dB higher or a little bit more.
Yes, an air compressor, even at the quietest levels, is still going to be a little bit noisy overall. It just operates at too high of a level for sound to be avoided entirely.
The good news is that people will still be able to talk to different people and have a way to function without it being too overwhelming.
The sound of the compressor should stay pretty consistent from the first time it is used, to years later. If there is something troublesome, that usually means that it might be compromised a bit.
When hearing a rattling sound, there could be a part of the air conditioner that has come loose. If there is a loud humming, the capacitor might be starting to fail. The motor could need repair as well.
The sound might be tolerable to a certain degree, but remember that it should be repaired early on if there is something going wrong.
The sooner it is repaired, the easier it is to fix. If it gets to be too bad, there might be a chance that it needs to be completely replaced, and that will frustrate a lot of people out there.
Not everyone will see the importance of a quiet air compressor, but it is definitely worth investing in if it is going to be used regularly.
Overall, having a quiet workspace makes a lot of sense, and they are not really that much more expensive than the cheapest options out there.
As long as the person knows what to look for, they could find a quality option that will produce at a high level. Air compressors can be extremely valuable, and investing smartly makes all the difference in the world.
If you live in an apartment, you may be asking yourself how to soundproof an apartment! Whether it’s your upstairs neighbor’s footsteps or the sound of traffic outside, unwanted noise can make it difficult to get a good night’s sleep or focus on work.
So how to soundproof an apartment? Some of these strategies involve placing bookshelves or other barriers along the walls, using carpeting in key locations, or investing in soundproofing panels that can be installed on ceilings, doors, and windows.
Whether you’re a longtime renter or just starting in your first apartment, there are many things you can do to keep sounds from interfering with your peace and quiet.
With a little bit of effort and some good planning, you can create a more peaceful environment where you can focus on work or simply relax without being distracted by outside noise.
Here are several things you can do to soundproof an apartment and create a peaceful oasis right away. I will also touch on how to soundproof an apartment wall, window and door!
1. Use Bookshelves to Block Out Noise.
Bookshelf apartment soundproofing
By placing bookshelves along shared walls or in other high-traffic areas, you can help dampen the sound of footsteps and other noises.
The thicker the shelves, the more effective they will be at absorbing sound. In addition, you can add acoustic panels to the shelves to further reduce noise and echo within the room.
One great tip is also to sandwich a layer of Mass Loaded Vinyl (Amazon) in between the wall and the bookshelf. This will add mass to the wall and you can bring the layer of Mass Loaded vinyl (MLV) with you when you move out of the apartment!
Just make sure you place the MLV and the bookshelf on the entire surface of the wall because it won’t be very effective if you only treat half the wall.
2. Install Acoustic Panels on your Walls, Ceilings, and Doors
There are a variety of acoustic panels (Amazon) and other soundproofing materials that you can use to improve the quality of noise in your apartment.
These panels aim to reduce echoes and reverberations in your apartment, reducing the overall volume of sounds coming from outside. (Source)
For example, you can install ceiling tiles or add carpet padding to reduce echoes and reverberations from footsteps and voices.
Additionally, using special sound-blocking curtains or heavy drapes over windows can also help reduce unwanted ambient noises from outside.
3. Invest In Noise-Canceling Headphones or Earplugs.
This can help to reduce the number of distractions and help you to focus on your work. Some noise-canceling headphones or earplugs can be quite expensive, so you may want to consider other options first.
For example, a simple pair of foam earplugs are very inexpensive and still provide some noise reduction. Alternatively, if you have the option to choose where to to work, try finding a quieter location in the office or even working remotely.
There are many different ways that you can minimize distractions while trying to focus on your work. Noise-canceling headphones and/or earplugs are an excellent solution for those who work in loud environments.
These devices isolate the sounds around you so that they aren’t as noticeable, allowing you to concentrate more easily on your work.
However, these aren’t for everyone. Some people don’t see headphones as a solution, but as more of a cover-up. There is also such a thing as ear fatigue if they are worn throughout the day.
Three Layered Sound Deadening Curtains (Amazon) and drapes are another great way to block out sound from noisy neighbors or traffic outside, as they can help absorb some of those sounds before they reach your apartment.
This will help absorb sound and create more soundproofing so that you don’t have any outside noise interfering with anything on the inside.
Many different types of heavy fabric can be used for this purpose, including blankets, curtains, and acoustic tiles.
Sound Deadening Curtains
Be sure to choose a fabric that works well as a sound absorber and is also flame-resistant since it could be next to electrical equipment.
Once you’ve hung the fabric, take some time to test out the acoustics in your space. You may want to add more fabric or sound-dampening materials if you find that the noise level is still too high.
If you’re satisfied with the results, they also double as a great way to keep the sun out.
5. Use Rugs and Other Soft Furnishings to Help Muffle the Sound
Placing thick rugs on the floor or soft pillows on furniture can help absorb some of the sounds that make their way into your apartment, making it easier to focus and relax.
Thick rugs on the floor can help muffle footsteps and other noises coming from below, while soft pillows on furniture can help dampen the noise coming from above.
Try to keep everything looking nice inside the room so that it is aesthetically pleasing as well. Too many people overlook that step, sacrificing the look of their interior to help with soundproofing.
6. Look for Appliances with Quieter Motors
Your dishwasher, washing machine, and dryer all generate noise when they’re in use, so try to find models that produce less sound while they’re operating.
Alternatively, you can look into purchasing a decibel reducer kit to reduce the overall volume of these appliances while they’re running.
There is a lot of new technology out there with appliances that make things quieter right away.
Some people might not know this since they haven’t had to purchase in recent years. Shop around, as there are ways to start hearing a difference soon.
8. Place your Furniture Away From Shared Walls
If your sofa is up against a shared wall, the sound of footsteps or other noises from the adjacent apartment can be amplified.
By moving your furniture away from these walls, you can help reduce the amount of noise that comes into your apartment.
Apartment walls are thinner than ever, which has caused a lot of people to realize that shared walls need to be avoided as much as possible.
Having a bare apartment likely causes a lot of sound issues overall. Try to load up the walls with different things, and don’t necessarily sit next to them if they are troublesome.
9. Use Weather Stripping to Seal Gaps Around Doors and Windows
Gaps and cracks around doors and windows can let in unwanted noise, so be sure to use weather stripping to seal them off. This will also help improve the overall energy efficiency of your apartment.
Most people already have some form of weatherstripping on their doors at this time. They also usually come included with just about every window installation. However, it could be time to upgrade them if they are not performing as they should.
Like everything else, there have been quite a few advancements in weather stripping overall. What works in the past might not be as great for soundproofing these days.
It makes a lot of sense for people to go out there and try to make some upgrades, as it’s pretty affordable even when going for premium options.
10. Treat Electronics Properly
Quiet PC Case
Don’t forget about the electronics in the apartment. Many electronic devices like computers (Quiet PC Tower Amazon), TVs, and stereos can produce distracting noise, so be sure to keep them in low-traffic areas of your apartment. There are also ways to soundproof them at times.
Be creative with placing noisy electronics in areas already soundproofed pretty well. If there is any type of echo inside the apartment, it’s going to become that much more of an issue when there are a lot of sounds generating from that area.
11. Choose Sound Deadening Paint for the Walls and Ceiling.
Sound Deadening Paint
Special soundproofing paint (Amazon) might work to help absorb sound waves, making it easier to create a peaceful environment in your apartment.
Soundproofing paint can help to reduce the amount of noise that enters our homes and workplaces, and make our environment more pleasant and peaceful. That is, as long as it is accompanied by other solutions.
There are many different types of soundproofing paint available on the market, and each has its advantages and disadvantages.
Some types of sound deadening paint are more effective than others, and some are more expensive. However, there is no one-size-fits-all solution, and the best type of soundproofing paint for your needs will depend on the specific situation.
Keep in mind that doing nothing else but slapping on some soundproofing paint won’t create a noticeable solution. Combine soundproofing paint with a few other tips from this list to get the best results.
13. Talk to Your Landlord or Property Manager
Talk to your landlord or property manager about potential solutions for reducing noise levels in shared spaces like hallways or laundry rooms.
For example, they may be able to install thicker doors in these areas, or add padding under carpeting to help insulate against noise.
It seems like a lot of people are very hesitant to ever talk to their landlord or property manager to see if something could be done about sound.
While everyone is different, some landlords are probably fine with making some small changes to improve the overall quality of life for the tenants.
It’s important to know that it’s not only helping your particular apartment, but the neighbors as well. If they are having trouble renting out certain units, showcasing their upgrades in soundproofing can be beneficial.
What some people will run into is that their landlord or property manager has their hands tied a bit. If there’s nothing that they can do themselves, then it’s up to the individual tenant to fix things.
Go ahead and ask them what can and can’t be done to the property to help with soundproofing. Some will allow people to put in more permanent solutions if they wish, as long as they are removed when moving out.
14. Talk with the Neighbors
Get to know your neighbors and talk to them about ways to reduce noise levels in the shared spaces of your apartment building. By working together, you can find solutions that will benefit everyone in the building.
Soundproofing a wall is so much more effective when there is treatment on both sides. The only way to get access to the other side is to work with a neighbor.
Since most people want to have peace and quiet, it’s usually not that hard to have a discussion with a neighbor and see what happens.
The unfortunate thing is that a lot of people don’t have a great relationship with their neighbors if they are renting.
It can be a little tough to establish a relationship and have a conversation, but when approached the right way, many are open to the idea of looking into some cheap soundproofing solutions that could help out everyone involved.
If it ends up working out well with one neighbor, reaching out to the others could be much easier. When you live in an apartment building, it is important to be aware of how your actions can affect your neighbors.
One way that this can happen is by creating too much noise, which can disturb those around you. To avoid this issue and not get the label as the problematic one, look into making many of the improvements detailed in this article.
15. Considering Moving
No one enjoys having to move. However, if all else fails, consider moving to a quieter location. If the noise levels in your current apartment are just too loud for you to handle, it may be time to look for a new place to live.
But before you make any decisions, be sure to check with your landlord or property manager first to see if there are any options for soundproofing your current apartment.
How Much Does it Cost to Soundproof an Apartment?
Soundproofing an apartment can be a costly endeavor, but it is worth it if you want to enjoy some peace and quiet. There are many different ways to soundproof an apartment, and the costs will vary depending on the method you choose.
The best suggestion is to start with something cheap and see what happens from there. For some people, it might be as easy as moving around some of the furniture inside of an apartment and hearing the difference.
If that blocks the minimal distractions that were going on, there’s no other reason to invest additional money.
For others, they could be spending quite a bit of extra money since they are only coming up with temporary solutions that can easily be torn down once it’s hard to move out.
It’s not the most expensive thing in the world, but it does start to add up if the apartment is big and there are a lot of formal areas.
Shopping online usually provides the best deals when getting soundproofing material. However, since some of the soundproofing material is rather bulky, it might be easier to shop locally as well.
Installation is relatively straightforward, but there are always options to hire professionals to take care of jobs.
Overall, the cost of soundproofing an apartment is usually not enough to sway people not to look into it if noise is a true issue. There is no price to put on peace and quiet inside of a small dwelling.
Additional Apartment Soundproofing Tips
Some people might still have questions about soundproofing an apartment. If possible, doing research beforehand can save some hassle later on.
Is there an easy way to tell what type of insulation and soundproofing an apartment already has?
Unfortunately, it’s very challenging to know what kind of insulation soundproofing apartment currently has. The best way is to ask the landlord to property management, but they may not always give an accurate answer.
Try to let them know that you are particularly sensitive to noise, and they might be a little more candid with their response.
Going online and doing some research by reading some reviews can also help out. People are a lot more honest about how something sounds in this case.
How to Know If an Apartment has Great Soundproofing?
Before signing the lease, try to check out an apartment at different times a day. Ideally, someone wants to try to be there at times when they will be there if they live there. That way, it can be easy to spot if it will be a problem later on.
Try to pay attention to noise coming from outside and inside the complex. There could be some temporary noise such as construction, but try to see how long that construction lasts. Even though it might seem temporary, it could last for months and months.
How to Find an Apartment with Good Soundproofing?
It’s very hard to get accurate reviews these days on just about anything. Online reviews seem to show a little bit of bias one way or the other.
Most people are not that inclined to leave a positive review, but they will definitely voice their opinion if it’s negative.
When approaching the leasing office or property manager, it can be challenging to get accurate answers as well.
Their main goal is to lease out the property, so they might not always be as truthful as possible with sound and noise issues as one would like. They will talk in marketing terms more often than not.
The best, most accurate reviews tend to come from families and friends. They want to help out who they know, not protect a leasing office.
Unfortunately, people might not always have family or friends to count on during this time. That’s when reading reviews online and trying to find as much information as possible is worth it.
Usually, fake reviews are short and lack detail. Sift through those lackluster ones and focus on what provides the best, most accurate details.
Whenever you purchase or rent an apartment, there is a common understanding that there will be some noise.
Whether it’s coming from the outside, other neighbors, or any other source for that matter, people have come to terms that they won’t get 100% silence when living in an apartment building.
Why exactly is that the case? You might be surprised that sound ends up leaking through for a variety of reasons.
Some people are frustrated that apartment complexes seemingly can’t figure out how to solve this ongoing issue.
Even though it might seem simple on its surface, it’s really anything but. A lot of the reasons that a company comes running into you can be summed up with the following reasons why they don’t do as much soundproofing as you might want.
Soundproofing Cost
Most people have read about how affordable soundproofing can be in a home. So how could cost actually be a negative when looking for an apartment?
This mostly has to do with the amount of money spent on an entire apartment complex, and the intricacies that go with that.
Each unit needs its own work done to be soundproofed. Since it’s not a level of soundproofing that the vast majority will need, companies putting apartment complexes together don’t feel like it is worth the extra cost.
A lot of companies do not feel like they are going to make up that amount of money by raising the rent a lot, since it’s not a selling feature that demands as much of a price increase.
Obviously, there are unique situations where extra soundproofing might be necessary. For example, if the apartment complex is in a very noisy area in the first place, they need to make sure that they get the sound down to a reasonable level.
Otherwise, it might prevent people from ever even thinking about moving in. That’s when the extra investment into soundproofing it’s going to actually be worth it.
The truth of the matter is that companies are going to try to cut corners as much as possible. If they feel like soundproofing is not worth it, they are without question not going to invest in it.
Unfortunately, apartment complexes are only getting put together at cheaper and cheaper costs to try to maximize profit.
If soundproofing is unnecessary, they will leave it up to the renter or buyer to figure that out later on.
As long as people are more than willing to invest in soundproofing methods themselves, they won’t be putting that much pressure on companies to spend extra money.
Intricacies Of Soundproofing
Soundproofing is not always cut and dry when doing it on the mass level. Since companies would have to do the same to every single unit, it can get pretty complicated, to say the least.
Intricate setups for any apartment complex can become more and more frustrating, all the way to the point that they are constantly having to do a lot more repairs.
One of the most common methods to soundproof a wall is to use a decoupling technique. By decoupling the wall, The wall stud that is inside does not touch both sides of drywall.
This helps with some of the noise levels, but decoupling by itself is not going to provide the solutions that people are looking for.
It suppresses higher frequencies, but it does a bad job of blocking lower frequencies. That means not only is decoupling necessary, but so is adding extra layers of drywall, insulation, or other pieces of material.
All of this can lead to some unforeseen structural issues. It’s true that companies do this for a living and should be able to handle some of these issues, but it makes an apartment complex that much more complicated.
Sound can enter an apartment so many different ways, whether it is through lights, ventilation, and more that haven’t even been addressed.
This all becomes a very complicated issue that a lot of companies frankly do not want to deal with.
There might be specific issues that companies will spend the extra bit of money on, but everything else will be left up to those moving in.
This is where it really comes in handy if only a particular room in the apartment complex needs high-level soundproofing.
Additional Issues After Soundproofing Is Complete
If the issues caused by soundproofing are not enough, there could be some other side effects to properly controlling noise in an area.
What ends up happening is that a person moving in might not be able to do everything that they did in their last apartment to make it as warm and cozy as they would like.
A perfect place to start is to take a look at putting anything on the walls. Since the walls are decoupled, there are no studs touching both of the walls.
It’s not impossible to hang up pictures, throw up some wall art, or mount a television, but it just became much more challenging.
All of these walls become a lot more susceptible to potentially cracking, or even having serious structural damage. It takes just one water leak to become a very costly repair.
Adding extra layers and making the amount of material between the ceiling of one unit and the floor of the other is a great way to help soundproofing.
However, even if the building gets a tiny bit taller, the cost becomes a pretty big issue.
It might only seem like adding another foot or so for each level, but that height needs to come from somewhere.
Either all of the units themselves are smaller, or the company is spending a lot more money on the structure in general.
Either way, it costs money, and that makes the rent go up to a point that people might not be willing to pay.
How Important Is The Best Soundproofing Apartments?
While every person is different when they think of soundproofing, the average consumer is not putting it at the highest priority.
That’s because getting the best in soundproofing might be difficult when staying under budget and being competitive with everyone else.
Most people stress location over a lot of other qualities when shopping for an apartment. It is always going to cost more money to get a prime location, but is that money well spent compared to soundproofing? Most people will pick location over professional-grade soundproofing every single time.
The same goes for beautiful aesthetics like huge windows. Without big windows, it can feel very frustrating to get the type of open space that a person wants to enjoy views.
Soundproofing is to a certain extent important, but windows are always going to be more vulnerable.
Finally, safety is a major concern for a lot of people who are renting. This is especially true in older buildings.
Most people would rather opt for a fire prevention system that is going to keep them safe, rather than strictly soundproofing. Sometimes these two qualities can work together, so that’s not a problem.
You might be thinking that soundproofing is extremely important, and that’s why you are reading this article in the first place.
However, not everyone is going to pick that as the quality that they stress the most. In fact, most people are in the minority who think this way, so adjusting accordingly is the move to make.
How Can You Test How Soundproof An Apartment Is?
If soundproofing is very important from the beginning, there are a few ways to tell just how soundproof the walls are.
For example, the first thing to do is to look at how the floors are put together. Concrete floors or a steel joist system is going to be best for soundproofing. A wood joist system is going to be a lot more vulnerable.
The label of luxury apartments is thrown around quite a bit these days, but one thing to keep in mind is that this means that they should have at least normal acoustics inside.
It might not be the best of the best, but it’s not going to be paper-thin walls.
Pay attention to vulnerable areas when doing a tour as much as possible. Listen for any type of bathroom or toilet plumbing noises that could be complicating matters.
It’s never a good thing for people to have to hear this and can be very frustrating, to say the least. If it can be heard inside the unit, chances are the setup for neighbors can also be heard from time to time.
Finally, make sure to read as many reviews online as possible. It can be a little bit difficult to figure things out with a new apartment complex. But older ones will have plenty of people complaining about sound if it is truly an issue.
There are a lot of people who go online these days and make sure that their voices are heard as much as possible.
If there is an issue of any kind, there’s no question that a person will take it upon themselves to let everyone else know.
Best Way To Handle An Apartment Needing Soundproofing?
At this point, the majority of people are probably fed up with trying to find an apartment that has the best soundproofing.
The best way to go about it is to look for other qualities that are of importance, and then take care of soundproofing another time.
There are a bunch of different soundproofing hacks that people can use, and they are really not that expensive at all.
From DIY options to hiring a professional, getting started is fairly easy. From there, people can continue to add soundproofing solutions until they get to the point that they are satisfied.
The best thing is that a lot of methods are easy to remove, so the same soundproofing can go with a person when they sign a new lease and move to a different area.
That ends up saving a lot of money, as no one wants to constantly buy and re-purchase all this soundproofing material.
Overall, soundproofing definitely has its benefits in an apartment complex. Some apartments are always going to be better than others, and doing some research beforehand will help to cut down on any major issues.
At the end of the day, most companies are going to leave some of the soundproofing up to the tenants, so be prepared to spend a little bit of extra cash.
Final Verdict: Is It Worth Soundproofing an Apartment?
Everyone should look into simple soundproofing methods with an apartment, to begin with. They don’t take that much time, and they are usually pretty inexpensive.
Some will need to go to more extremes and others, and there are a variety of products that help out with that. A little bit of work in the very beginning will make life much easier and quieter for the average person.
There might not be as many permanent solutions when going with apartment soundproofing compared to house soundproofing.
However, with neighbors so close by, it just makes sense to look at soundproofing and any methods that can actually work.
It’s always going to be easier to start with soundproofing in the very beginning. As soon as it’s time to move in, have equipment ready to put in the necessary work.
While you can soundproof at any time, it’s much easier when there’s nothing else in the way. At the same time, don’t feel intimidation about noise problems with nothing inside of an empty apartment. It’s always going to be louder when nothing is helping out organically.
Soundproofing seems intimidating at first, but people get the hang of it and start to make some tweaks on their own.
It’s a game of trial and error more than anything, but at least a few methods above should work for those currently living in an apartment.
Setting up a home studio comes with a lot of questions for first-timers. One question that often comes up is whether or not bass traps need to be floor to ceiling.
While it makes a lot of sense from a coverage perspective, is it a feasible solution for the vast majority of people?
Do Bass Traps Need to be Floor to Ceiling? No, they don’t need to be floor to ceiling. Instead, look for wall-wall-ceiling and wall-wall-floor corners because of acoustic pressure. This is where it accumulates, and is much more efficient than floor to ceiling bass traps.
A floor to ceiling bass trap does great with absorption, but it takes up too much space on the floor for most people to feel satisfied.
Based traps are used to improve sound quality with all the different direct sounds and reflections happening inside of a closed area.
Low-frequency reflections come off the walls, floors, and ceilings. When untreated, they mess up direct sounds. Bass traps are great sound absorbers, reducing low frequencies below 300 Hz.
Not many realize that low-end frequencies have different wavelengths. To handle this issue, bass traps are pretty much essential. Whether it’s consuming or creating sound, bass traps essentially complete the area.
Where Should Bass Traps be Placed?
Base Trap Location
Look for the long distances inside of a room. Where bass waves build up, bass traps need to be installed. That’s why people usually have the biggest issues with corner-to-corner spaces and wall-to-wall distances.
Start by putting bass traps in the corner of the room. That’s where high-pressure sound waves are most likely to occur.
Think about placing two bass traps in each corner, or use the two corners closest to the speakers for treatment. Having them in the corners also takes up a lot less space, which can be crucial in some areas.
To be a bit more specific about placement, consider these three areas. When all three areas are covered, there is no longer a need to go beyond that for 99% of the people out there.
These traps are great for home setups, as well as professional rooms. There are not a ton of premium options out there, so most are using pretty much the same techniques to get the job done.
The technology might not be high-end, but they still make a world of difference when placed in the best positions. (Source)
Tri Corner
Tri Corner Base Traps
Sticking a bass trap where two walls reach the ceiling or floor is a great place to start. There will be eight tri corners in any standard room (number goes up with weirdly shaped walls). Try-Corner Base Traps (Amazon).
The best results will have bass traps in all eight corners, but not everyone can fit that into their budget.
Go with the upper corners first, as it offers slightly better absorption and saves floor space. It won’t be as great as having all eight corners covered, but it will still make an improvement.
Balance out the room with those four before putting any on the ground. Going with anything less than four will likely not have much of an impact.
Vertical Wall Corners
Vertical Wall Corners Bass Traps
Bass Traps Vertical Corners (Amazon) placed in a wall corner will reduce bass waves bouncing off the wall. Most people will combine vertical wall corners and tri corner treatment, as long as it fits in our budget.
Have a little bit of a gap between the corner and the bass trap with the setup. What it does is control the sound waves that bounce off the corners as they are absorbed by the bass traps.
Ceiling
A lot of floor to ceiling echo in a room is treatable with bass traps on the ceiling. Corners should be the most essential part, but placing horizontal base traps on the walls attached to the ceilings will help as well.
Going with bass traps that cover everything from floor to ceiling is overkill. For those who have fewer bass traps, put them halfway from the walls to the ceiling.
Make sure to treat the corners close to the speakers first, as it will absorb the low-frequency sound energy. Do a few different experiments to see where else they need to go before doing blanket coverage.
How Are Bass Traps Made?
There is a way to purchase ready-made bass traps for those who want to go that route. Others will think about the possibility of building them from scratch. They are fairly easy to build, needing just a few different items to bring it all together.
To start with, a wooden frame is necessary. Most will opt for something fairly convenient like a 1‘ x 4‘ set up. Since there’s a standard size, all the other sizes listed below are for that type of wooden frame.
Two fiberglass panels that are 2‘ x 4‘ become part of the project. Finally, some sort of breathable fabric like cotton, wool, or polyester rounds out a bass trap. The piece needs to be about 50‘ x 26‘to fit properly.
To start putting it together, lay the two pieces of fiberglass down. Clampdown the wood pieces of the frame and start screwing them together to make a perfect rectangular panel.
Look to pre-drill holes and potentially screw the long side of the panel into the short side to make life easier.
Once that’s done, cover up the frame with fabric. It needs to be stretched tightly, with the corner stapled so that it stays in place.
Once finished, put some picture wire and hooks on the back of the frame to put them up like a picture.
This makes it pretty easy to move around just about anywhere, and it’s an enjoyable experience for all involved. This process saves money, and it becomes easier and easier to put together as time goes on.
Shopping around for bass traps is pretty easy to do locally or online. Most people read up on what reviewers have to say to find the best deals currently.
Without investing much money, it’s pretty easy to have a few of them up and running. Because they are pretty big and the material is bulky as well, most buy locally so that they don’t have to spend a lot on shipping costs.
Different Base Trap Types
There are some minor variances out there as far as bass traps are concerned. Some absorb low-frequency sounds by trapping the waves before reaching a surface. Others will observe a wave’s pressure shortly after it hits a surface.
Porous Base Traps
This is the most common low-frequency absorber out there. Also going by the names frictional or velocity absorbers, they will slow down air molecules with friction.
This changes sound energy to heat, absorbing those waves. It’s very cheap to put together, and it works to absorb high and mid frequencies as well. Most porous base traps opt for acoustic foam, fiberglass, or Rockwool.
If there is a downside to porous base traps, it’s that they can’t absorb the lowest bass frequencies out there.
Even when extremely thick, they still struggle to get the job done. That’s another issue that comes up for some, as having bass traps that are too thick take up a lot of space.
Resonant Absorbers
These pressure absorbers work by trapping the wave as soon as it hits a surface. They are very effective in controlling sound by being specifically tuned for bass trapping. It ignores all other types of frequencies.
Setting up something like resonant absorbers is much more complicated for the average person. In fact, it’s highly recommended to go with a professional in this instance.
There are two types of resonant absorbers out there, as both a Helmholtz and diaphragmatic are worth looking into.
Do Bass Traps Actually Work?
Anyone currently looking at bass traps knows that they are pretty much essential when it comes to absorbing low-frequency waves. A good setup will make home studios, recording rooms, and so much more as dry as can be.
The best part is that there is no need to put bass traps going from the floor to the ceiling. It does end up being pretty effective, but just not applicable for the average person. By strategically placing them in the spots talked about above, it makes life easier for all.
Of course, bass traps are just one part of a proper setup for any acoustic needs. There’s still a lot of work necessary to ensure that everything sounds as it should. It’s a bit of an investment for anyone looking to improve a room, but worth it in the end.
This website uses cookies to improve your experience. We'll assume you're ok with this, but you can opt-out if you wish.AcceptRejectRead More
Privacy & Cookies Policy
Privacy Overview
This website uses cookies to improve your experience while you navigate through the website. Out of these cookies, the cookies that are categorized as necessary are stored on your browser as they are as essential for the working of basic functionalities of the website. We also use third-party cookies that help us analyze and understand how you use this website. These cookies will be stored in your browser only with your consent. You also have the option to opt-out of these cookies. But opting out of some of these cookies may have an effect on your browsing experience.
Necessary cookies are absolutely essential for the website to function properly. This category only includes cookies that ensures basic functionalities and security features of the website. These cookies do not store any personal information.